網站版面樣式修改記錄
我的 huanlin.cc 網站是 host 在 Github 平台上,網頁生成工具是用 Hugo 搭配 Docsy theme。本文的目的是記錄我對此網站的 Hugo 與 Docsy 主題框架做了哪些調整。
我把所有調整或新增的檔案放在 Github 上面:docsy-customization。如果你要使用的話,只要先在你的網站安裝好 Docsy theme,然後把我的 repo 中的檔案覆蓋掉你的網站裡對應的檔案,即可套用我的自訂樣式。
文件首頁
先大概看一下 look and feel 有何差異。
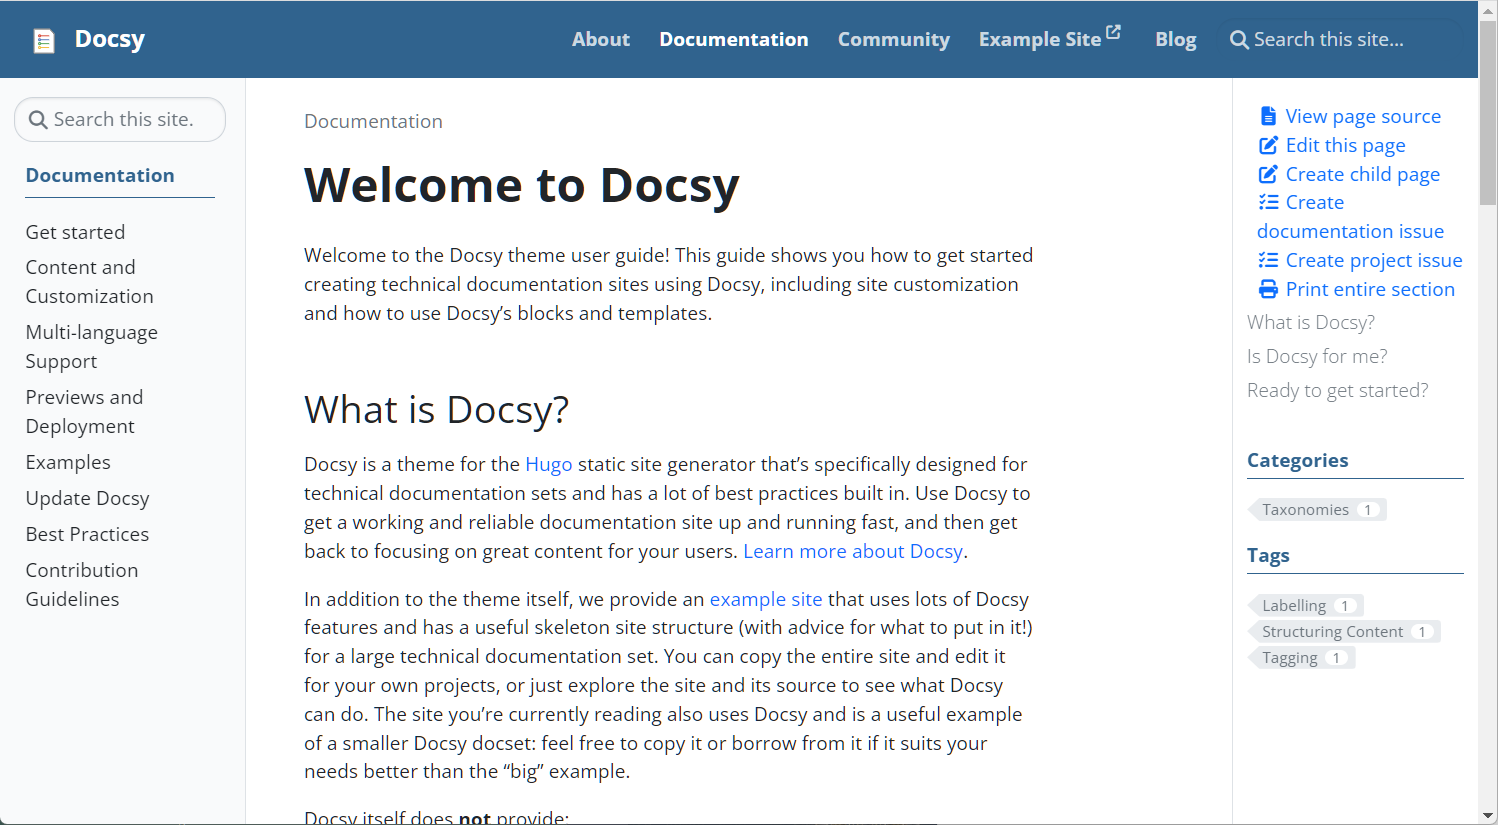
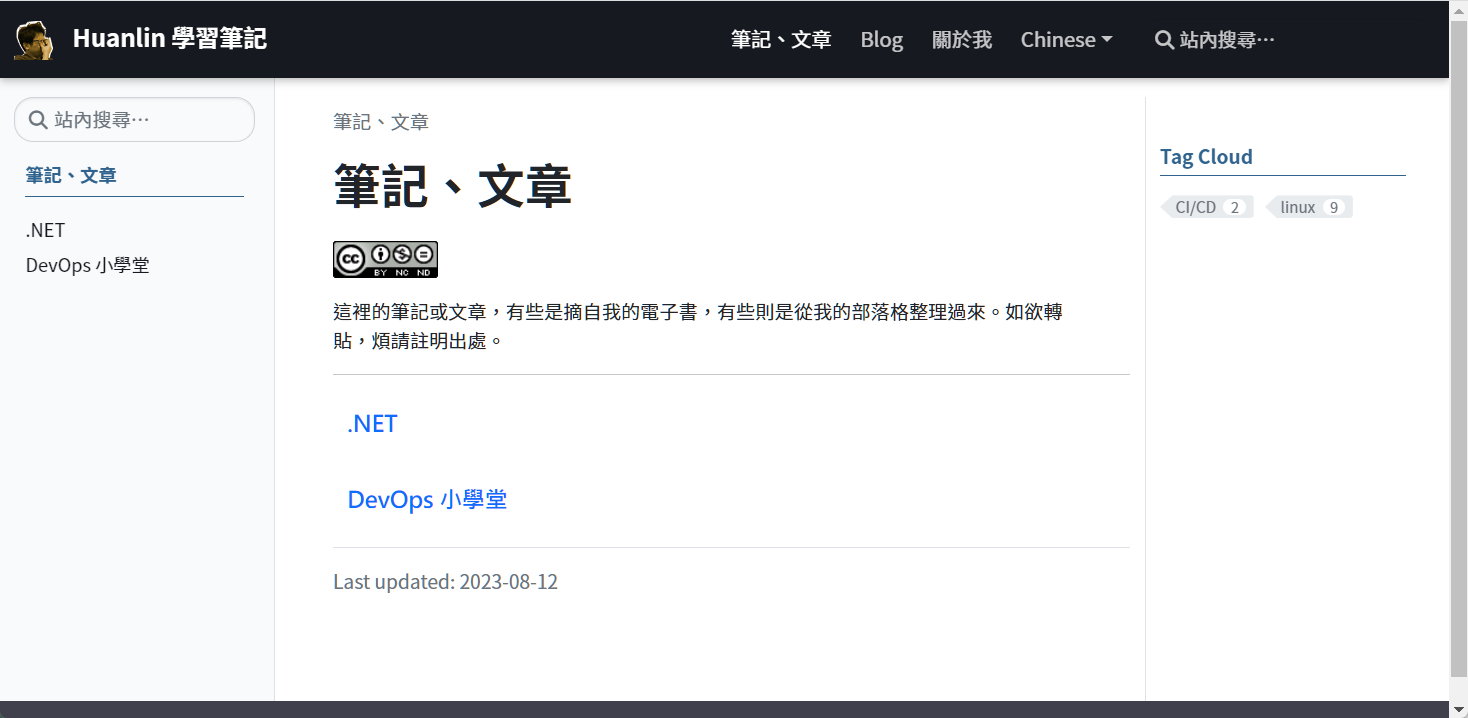
入口基本上沒有太大差異,我主要是針對「文件」,也就是 docs 目錄下的頁面排版樣式來做調整。
撰寫本文時,Docsy 展示網站的 docs 首頁 長這樣:

我的網站的文件首頁:

在調整樣式的時候,我經常參考和模仿 Material for MkDocs 的網頁風格,包括顏色、字體大小等等。詳見 _variables_project.scss 和 _styles_project.scss。
左側選單
左側選單(sidebar menu)主要有兩處修改:
- 顯示三角形箭頭圖案,方便使用者一看就知道哪些選單項目還有子項可展開,以及哪些項目是沒有子項的葉節點。
- 記住捲軸位置。
顯示三角形箭頭圖案
Docsy 官方文件的 Navigation and Menus 的 Section menu options 一節當中有說明,只要修改 Hugo 組態檔,將 params.ui.sidebar_menu_foldable 參數設定為 true,即可令左側選單出現三角形箭頭圖案來表示可展開/摺疊的選單項目。
以下摘自我的 hugo.toml 檔案內容:
# User interface configuration
[params.ui]
# Enable to show the side bar menu in its compact state.
sidebar_menu_compact = true
# 讓左邊選單可以折疊/展開
sidebar_menu_foldable = true
儘管 Docsy theme 有提供這個選項,但是它的 展示網站 並沒有啟用此功能,再加上 Docsy 範本的 hugo.toml 檔案裡面也沒有 sidebar_menu_foldable 參數,所以我一開始就以為 Docsy 無此功能。我相信應該也有不少人跟我一樣吧,以至於 GitHub 上面的 issue #100 在我寫這篇筆記的時候都還是 open 狀態(可能後來才加入此功能,但 issue 沒人去更新了)。
記住捲軸位置
在操作 Docsy 的左邊選單時,如果在子項目之間點選切換,每點一次就會因為網頁重新載入而令左邊選單也重新整理。雖然 Docsy 會記住目前選擇的項目,並且令該項目加粗顯示,但卻不會記住捲軸位置。這會造成一個對使用者操作上的不方便,因為當左邊選單的項目很長的時候,使用者透過左邊選單區塊的垂直捲軸往下找到想要查看的文章,點選之後,左邊選單就會因為網頁重新載入而令捲軸位置回到最頂端,於是就看不到先前選取的那個項目了。
光看以上文字說明可能不好理解,但只要自行操作看看 Docsy 展示網站,應該就能發現問題所在。
針對此問題,我加了一些 JavaScript 來記住左邊選單的捲軸位置。詳情:Keep Sidebar Menu's Scroll Position
文章右邊的大綱連結
檔案:/layouts/partials/toc.html
閱讀文章時,右邊會有一個區塊顯示文章大綱連結,也就是內文的各級標題連結。
原本:
  <div class="td-toc">
    {{ . }}
  </div>
改成:
  <div style="margin-left: -2px; font-weight: 700; padding-bottom: 8px;">Table of contents</div>
  <div class="td-toc">
    {{ . }}
  </div>
也就是在大綱區塊上方加上一行 "Table of contents"。有些網站是用 "In this article:"。
導覽列
檔案:/layouts/partials/navbar.html
Docsy 原本是用 logo.svg 作為網站頂端導覽列的 logo 圖案,我的 logo 是 .png 格式,所以也做了修改。
原本:
  {{ with resources.Get "icons/logo.svg" -}}
    {{ ( . | minify).Content | safeHTML -}}
改成:
  {{ with resources.Get "icons/logo.png" -}}
    <img src="{{ .RelPermalink }}" class="logo-image-height">
同時必須在 /assets/scss/_styles_project.scss 檔案中加入以下樣式:
.logo-image-height {
  height: 32px;
  padding-right: 12px;
}
Blog
/layouts/blog/list.html
原本:
<p class="pt-0 mt-0">{{ .Plain | safeHTML | truncate 250 }}</p>
那個 truncate 250 的作用是取部落格貼文的前面 250 個字元來當作 "Read more" 之前的摘要。但我發現 250 個字元對中文的帖子來說太長了,不好看,所以我把它改成 100:
<p class="pt-0 mt-0">{{ .Plain | safeHTML | truncate 100 }}</p>
另外,中文語系的用詞也有點過於簡略。原本叫做「更多」,我覺得「閱讀更多」或「閱讀全文」會更好一些,故我也修改了 /i18n/zh-tw.toml。詳見:繁體中文語系檔案。
/layouts/blog/content.html
原本:
{{ with .Params.author }}{{ T "post_byline_by" }} <b>{{ . | markdownify }}</b> |{{ end}}
改為:
{{ if .Params.author }}
    {{ with .Params.author }}{{ T "post_byline_by" }} <b>{{ . | markdownify }}</b> |{{ end}}
{{ else }}
    {{ with $.Site.Params.default_blog_author }}{{ T "post_byline_by" }} <b>{{ . | markdownify }}</b> |{{ end}}
{{ end }}
同時在 hugo.toml 檔案中增加 default_blog_author 參數:
[params]
default_blog_author = "Michael Tsai"
如此一來,每一篇部落格帖子的檔頭就不用提供 author 屬性。
/assets/scss/ 資料夾
以下分別
_variables_project.scss
檔案內容:
/*
  Add styles or override variables from the theme here.
*/

$google_font_name: "Noto Sans TC";
$google_font_family: "Noto+Sans+TC:300,300i,400,400i,700,700i";

@import "_admonition_variables";
@import "_admonition";
其中 import 的 _admonition.scss 和 _admonition_variables.scss 也是放在同一個目錄下。這部分的細節已整理在另一篇文章:Admonitions。
_styles_project.scss
CSS 樣式的部分就不解釋了,直接把檔案內容貼上來:
// This is a custom SCSS file for Hugo Docsy theme.
// See: https://www.docsy.dev/docs/adding-content/lookandfeel/#project-style-files

/*
  For MediumZoom.js to force the zoomed image to be displayed on top of everything.
  Without these settings, the zoomed image will display under some elements on the page.

  Ref: https://github.com/francoischalifour/medium-zoom#debugging
*/
.medium-zoom-overlay,
.medium-zoom-image--opened {
  z-index: 999;
}

// For admonitions. Copied from MkDocs Material (by Michael Tsai 2023-8-6).
:root > * {
  --md-shadow-z1: 0 0.2rem 0.5rem #0000000d,0 0 0.05rem #0000001a;
  --md-shadow-z2: 0 0.2rem 0.5rem #0000001a,0 0 0.05rem #00000040;
  --md-shadow-z3: 0 0.2rem 0.5rem #0003,0 0 0.05rem #00000059;

  --md-primary-fg-color: #16191F;
}

:root {
  --bs-body-font-family: Noto Sans TC, -apple-system, BlinkMacSystemFont, Segoe UI, Roboto, Helvetica Neue, Arial, sans-serif, Apple Color Emoji, Segoe UI Emoji, Segoe UI Symbol;
  --bs-font-monospace: SFMono-Regular, Menlo, Monaco, Consolas, "Liberation Mono", "Courier New", monospace;

  // for mark tag
  --line-yellow: url("data:image/svg+xml;charset=utf-8,%3Csvg preserveAspectRatio='none' width='120' height='6' viewBox='0 0 120 6' xmlns='http://www.w3.org/2000/svg'%3E%3Cpath d='M119 0.8C60 4 50-0.5 1 1.5' stroke='%23fc0' stroke-width='2' fill='none' stroke-linecap='round'/%3E%3C/svg%3E");
}

.logo-image-height {
  height: 32px;
  padding-right: 12px;
}

pre {
  font-size: 0.9rem;
}

h2 {
  font-size: 1.9rem;
  font-weight: 600;
}

h2.feedback--title {
  padding-top: 2rem;
  font-size: 1.7rem;
  font-weight: 500;
  color: var(--md-primary-fg-color);
}

// Section 首頁的標題連結
.section-index h5 a {
  font-weight: 700;
  font-family: '微軟正黑體', var(--bs-body-font-family);
  font-size: 1.18rem;
}

.lead {
  font-size: 1.1rem;
  font-weight: 400;
}

.reading-time {
  margin-top: 20px;
}

.td-toc a {
  font-weight: 400;
}

.td-max-width-on-larger-screens {
  @include media-breakpoint-up(lg) {
    max-width: 95%; /* Docsy 預設為 80% */
  }
}

@media (min-width: 1200px) {
  // 左邊主選單的寬度
  .col-xl-2 {
    flex: none;
    width: 19%; // 原本為 16.66666667%
  }

  // 中間內文區域的寬度
  .col-xl-8 {
    flex: 0 0 auto;
    width: 60%; // 原本為 66.66666667%;
  }
}

// Docsy 預設的選單字型太大,顏色太淺,此處略作調整。
.td-sidebar-nav .td-sidebar-link {
  color: var(--md-primary-fg-color);
  display: block;
  padding-bottom: 0.375rem;
  font-size: 0.95rem;
  font-weight: 400;
}

// 左邊選單的子項目縮排
@media (min-width: 768px) {
  .td-sidebar-nav__section .ul-1 ul {
    padding-left: 1.2em;
  }
}

// 右邊的 table of contents 的樣式
.td-toc #TableOfContents a {
  color: var(--md-primary-fg-color);
  font-size: 0.9rem;
}

// 右邊的 table of contents 區塊的子標題縮排
.td-toc li li {
  margin-left: 0.9rem;
}

// 右邊的 table of contents 區塊的位置保持固定
@supports (position: sticky) {
.td-sidebar-toc {
    position: sticky;
    top: 6rem;
    height: calc(100vh - 6rem);
    overflow-y: auto;
  }
}

// 頁面頂端標題列(導覽列),樣式取自 Material for MkDocs。
.td-navbar {
  background: var(--md-primary-fg-color); // #30638e;

  // 下方加上陰影
  box-shadow: 0 0 0.2rem #0000001a, 0 0.2rem 0.4rem #0003;
  transition: transform .25s cubic-bezier(.1,.7,.1,1),box-shadow .25s;
}

// 頂端導覽列的字體
.td-navbar .nav-link {
    text-transform: none;
    font-weight: 500;
    font-size: 1.05rem;
}

// The outer page container for the default base template.
.td-default {
  main {
    > section:first-of-type {
      @include media-breakpoint-up(md) {
        padding-top: 1rem; // by Michael: 原本是 8rem
      }
    }

    section {
      @extend .td-block-padding;
    }
  }
}

// img[src$="#center"] 用來將圖片置中
img[src$="#center"] {
  display: block;
  margin: 1.0rem auto;
  max-width: 100%;
  height: auto;
}

// Mark tag as a yellow underline.
mark {
  color: inherit;
  background: var(--line-yellow) bottom left/100% 0.3em no-repeat;
  text-decoration: none;
  padding-bottom: 0.3em;
}
繁體中文語系檔案
底下是我修改的繁體中文語系檔案 /i18n/zh-tw.toml 的內容:
[ui_search]
other = "站內搜尋…"

[post_reading_time]
other = " 分鐘左右可讀完"
[post_less_than_a_minute_read]
other = "1 分鐘內可讀完"

[post_last_mod]
other = "Last update"

[post_byline_by]
other = "作者:"

[ui_read_more]
other = "閱讀全文"
說明:
[post_byline_by]是用於部落格文章的作者姓名之前的標籤文字。若使用 Docsy 原本的檔案,顯示作者姓名的時候會像這樣:藉由 Michael。[ui_read_more]在英文語系檔案裡面的用詞是 "Read more",可是到了中文語系的檔案裡面卻是「更多」——只有 more,沒了 read 動作。[post_last_mod]我決定使用英文 "Last update"。
如欲取得完整檔案內容,可以從我的 Docsy fork 下載 zh-tw.toml。